Do you want deeper connections to your food? Do you want to learn about wildlife? Do you want to have fun outdoors? Bowhunting provides all those things and more.
The animals you pursue with a bow and arrow mostly depend on where you live. The most common big-game animal for bowhunters is the white-tailed deer because they’re highly adaptable and live in nearly every state in the U.S. They inhabit Northern forests, Southwestern deserts, coastal areas and just about everywhere else in between.
In this beginner’s guide to bowhunting white-tailed deer, you’ll learn what you need to know to bowhunt whitetails.
Click on the links below to jump to a specific section.
– Bowhunting Gear
– Hunter Education, Bowhunting Licenses and Hunting Laws
– About White-tailed Deer
– Where to Hunt
– Hunting Fundamentals
– Shot Placement
– Field Dressing
– Processing Your Deer
– Bow and archery gear
– Treestand safety harness
– Treestand or ground blind
– Knife
– Camouflage clothing
– Backpack
– Headlamp or flashlight
– Wind checker
– Butchering equipment
– Deep freezer
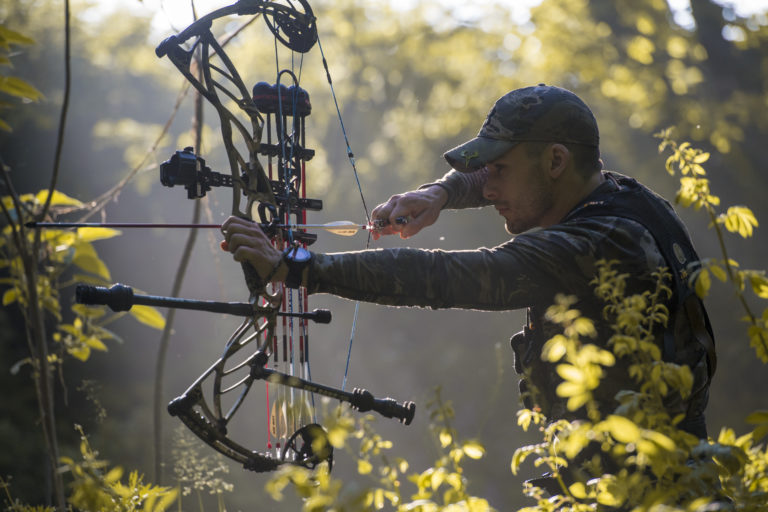
What do you need to bowhunt white-tailed deer? The longer you bowhunt the more likely you’ll fill your garage with great hunting gear, but you don’t need much to get started. The first gear most bowhunters buy is a bow, arrows, broadheads and archery accessories.
Archery gear is an excellent first purchase because you should start practicing right away. Gear usually comes down to your budget and personal preference. An archery shop’s staff will help you choose, and then fit the bow to you and tune it for good arrow flight. Save room in your budget for several archery lessons to help avoid bad habits while learning the fundamentals.
When bowhunting whitetails, most hunters scout to find an area that deer use, and then wait for them to appear. To hide, many bowhunters use treestands. These elevated platforms give a commanding view from above the deer’s usual sight line. Bowhunting’s critical moment occurs when you draw your bow. You must remain undetected. Deer flee if they see any movement. If you use a treestand, wear a safety harness, which keeps you from falling to the ground if you slip. Helpful treestand accessories include a bow hanger and pull rope for raising and lowering your bow and other gear.
If you’re more comfortable on the ground, a blind conceals you by putting camouflaged walls between you and the deer, and small screens to look and shoot through. Shooting through the mesh won’t disturb your arrow’s flight, but take a test shot or two so you can shoot through it with confidence. Ground blinds set up easily, and pop-up models sold at archery shops are light and portable. They also put you at eye level with deer, which is a cool experience.
If these tools aren’t in your budget you can hunt using natural cover. That’s a challenging way to hunt, but provides great experiences and lets you easily hunt different locations.
A bowhunting backpack must meet the demands of areas you hunt. Bowhunters who pursue whitetails can usually get by with a small daypack of 1,200 to 2,000 cubic inches to carry snacks, water and gear.
Some bowhunters like using a larger pack with a frame to carry their treestand, climbing sticks and hunting gear. These backpacks come in many sizes for various loads, and their frames often adjust to match your torso. Properly fitted backpacks carry heavy loads that comfortably distribute weight to your hips. That’s especially important for packing heavy loads in hilly or mountainous areas. Quality backpacks require fitting, so buy from a store where an experienced clerk/hunter can help you test and choose the right size and model.
A field-dressing kit includes latex gloves and a sharp knife. Some bowhunters also carry a bone saw. If you’ve never field dressed an animal, print field-dressing instructions and stash them in your kit. If you’ll butcher your kill once home, you’ll need a vacuum sealer or freezer paper to preserve your meat in a freezer. Many bowhunters buy an extra freezer to store their meat.
A standard freezer that’s part of your refrigerator can often hold an average-sized deer, but little else. That’s why most bowhunters own a chest or upright freezer. The size you’ll buy depends on whether you’ll use it for freezing game meat or other foods, too. For perspective, a 5.1-cubic-foot freezer can hold about three processed deer.
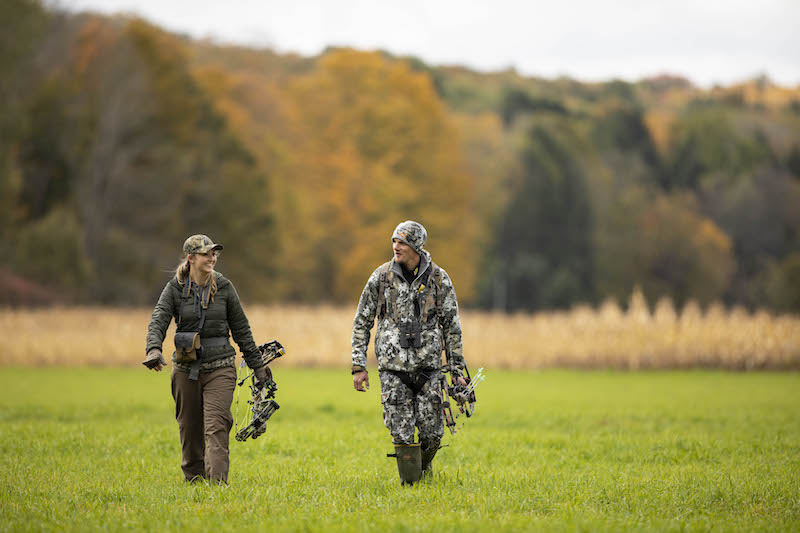
Make sure you dress in layers and wear the appropriate boots for your hunting grounds. Photo Credit: ATA
Sturdy, high-quality broken-in boots fit your feet and protect them in any weather or terrain. Dry, warm, blister-free feet help you hunt hard and long. Choose boots based on expected weather and hunting locations. Western hunts require rugged boots that hold your feet and ankles firmly for stability, and to protect your toes during steep descents. Boot sizing varies, so visit a reputable store and try several pairs before buying. If you hunt in warm climates, your boots must be breathable. If you hunt wetlands and marshes, choose quality calf- or knee-high rubber boots. And if you’re hunting cold regions, buy insulated boots, especially if you’ll sit for hours in treestands or inside ground blinds.
Proper fit is critical for bowhunting clothes. When you release the bowstring, it must not strike a baggy sleeve, which will ruin your shot. Clothes must be practical and comfortable, so buy from a store where you can try them on before buying.
As with boots, hunting clothes must match your hunting conditions. Early-autumn hunts in warm temperatures require lightweight clothing that wicks moisture. Cold conditions require layering systems that include a base layer, insulation layer, and outer shell so you can regulate your temperature. Warm hats, gloves and socks are vital for cold-weather hunting.
Even with a well-prepared entry trail, you’ll need a light to help you find your way before dawn and after dusk. Headlamps are excellent lights because they strap to your head, freeing both hands for carrying your bow and other gear, and pushing aside branches. Hands-free lighting also makes it safer to climb into treestands and field dress game. Standard flashlights are also good options, especially as backup lighting.
Many bowhunters consider wind indicators essential gear. They’re usually plastic squeeze bottles filled with white, lightweight powders you puff into the air. Watch the powder to see which direction it blows. These devices also detect subtle thermal currents, so check the wind regularly.
The equipment we’ve discussed is general, and what you need varies by region. Mountainous areas usually require gear that differs greatly from gear you’ll need for bowhunting marshes or swamps. For specific gear advice where you hunt, visit an archery shop in that area.
Bowhunting newcomers have many questions. Which hunting laws apply? How do I safely hunt from treestands? How do I process game animals for their meat?
Bowhunter education courses are usually held on weekends, and answer all your questions as you prepare to start bowhunting. Let’s review what you should know about these courses.
An important reason to take a hunter- or bowhunter-education course is that it’s a prerequisite for buying a bowhunting license in some states. These classes are sometimes called hunter-safety courses. To bowhunt in most states, you must pass a state-approved course. Prerequisites vary, so check your wildlife agency’s website for requirements.
Even if your state doesn’t require bowhunter education, these courses are great learning opportunities. You must learn bowhunting’s necessary skills before carrying your bow into the woods. You’ll get a crash course in bowhunting basics, game laws and hunter safety. You’ll also learn many critical skills to boost your confidence in the woods.
Bowhunter-education courses are taught at schools, colleges, archery clubs, archery shops and municipal buildings. Some classes are taught online, but make sure they’re recognized by your state’s wildlife agency. Agency websites list classes and locations. Sign up early because they fill quickly.
Hunting laws can seem complicated and hard to understand, but they’re reviewed in depth during class. By the end of the course, you’ll understand your state’s hunting laws and seasons.
Additional topics include hunting tactics, treestand safety, hunter safety, hunting laws, shot placement, blood trailing, field care and equipment needs. You’ll also learn to use a treestand harness and avoid common hunting accidents.
Shot placement and field care for deer you arrow are important. Bowhunters must know exactly where to aim on deer at different angles to ensure quick, humane kills. Bowhunters must also be able to read sign and follow blood trails.
Field dressing animals gives some beginning bowhunters angst, but experienced bowhunters will walk you through the process during class. You’ll soon feel confident field dressing animals.
After passing your bowhunter education course, you’ll get a certification card with an ID number. This card and ID prove you’ve completed the course, which allows you to buy a hunting license.
Most states sell licenses online, and then mail the license or let you print it at home. You can also buy your licenses at some archery shops or other licensing agents.
By taking a bowhunter-education course, buying a hunting license, and visiting an archery store to buy a bow, you’ll take the first steps to becoming a bowhunter. Your next steps are to become proficient with your bow by taking lessons. Then find a place to hunt, learn more about hunting, do some scouting, and start hunting.
Find your state wildlife agency’s website here to determine its bowhunter-education requirements.
Deer can smell a hunter from great distances, spot anything that moves, pinpoint the faintest noise, and duck an arrow when preparing to flee. These superpowers make deer seem invincible to bowhunters. Their keen senses can keep them safe from bowhunters, but by arming yourself with knowledge and time-tested strategies, you’ll discover their kryptonite and find bowhunting success. Overcoming those challenges – and securing wild meat – help make bowhunting rewarding.
Deer can smell with the olfactory receptors on the roof of their mouth. Photo Credit: John Hafner
A deer’s olfactory senses are its greatest superpowers. Deer use their nose as a primary defense against predators. In fact, a deer’s nose might function better than a bloodhound’s nose. Olfactory receptors are the key, and a deer’s long nose is loaded with them. They have at least 800 times more receptors than your nose. But that’s not all: The roof of a deer’s mouth contains the Jacobson’s organ, which sorts out smells. As deer breathe, they automatically detect airborne odors, including human scent.
A deer has another weapon in its sniffing arsenal: its brain. A big part of the deer’s brain works to decipher smells; acting like a super computer as it interprets the faintest of scents.
How to defeat super smellers: The best way to defeat a deer’s nose is to use the wind, which carries scent through the air. Use this to your advantage by positioning yourself so winds blow your scent away from the deer. That means staying downwind of deer trails or feeding areas to stay undetected.
Hunters also leave behind trace scents with each step or touch. You don’t notice it, but deer certainly can. Wear rubber boots and clothes washed in scent-free detergents to reduce those trace scents. When walking to your stand or blind, try not to touch branches or trees. Also, choose a path that doesn’t cross deer trails. Finally, don’t hunt the same area continuously. The more you visit a site, the more scent you leave behind.
A deer’s hearing isn’t spectacular, but they hear as well as we can, and they have a huge advantage: Their ears are like large antennas that can independently swivel to capture sound from all directions. Those swiveling ears are also spaced far apart so they can triangulate and pinpoint a sound’s exact location. One wrong move or noise, and a deer will snap its head and zero in on you.
How to defeat super hearing: Avoid making unnatural sounds. Rustling leaves and falling acorns won’t alarm deer because they hear these natural sounds all day. But a bow bumping into a treestand makes a metallic “clink” that’s foreign to their world, and can send deer running.
You’ve seen superheroes dodge arrows and even bullets in the movies. Deer can actually dodge a speeding arrow, even though they aren’t consciously trying to do so. But even in rare instances when predators sneak within striking distance, deer have super-fast reaction times that thwart many attacks.
When a deer hears a bowstring release, its brain automatically processes that twang as a threat. Deer instinctively drop their body to spring-load their legs for a full-speed escape. Bowhunters describe that move as “jumping the string.” The deer drops so quickly that an arrow can fly over it harmlessly, especially at shots farther than 30 yards.
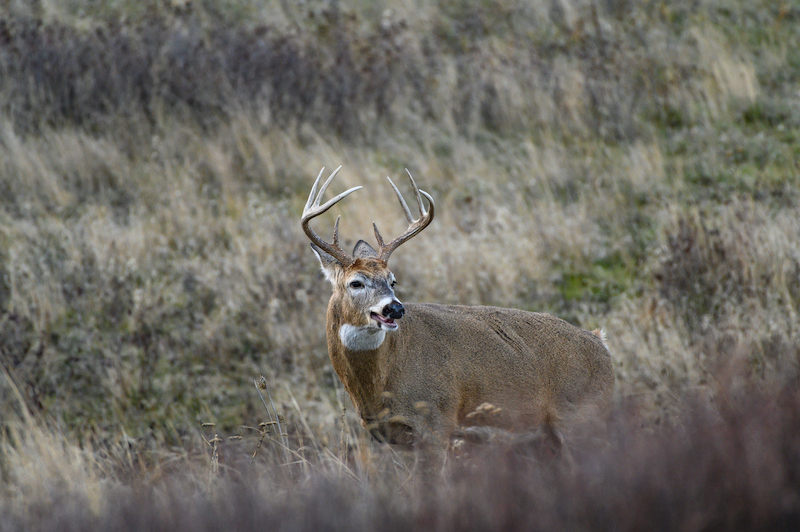
Deer are relaxed when they have their head down, eating. Photo Credit: John Hafner
How to defeat super reflexes: You need intimate knowledge of deer behavior. A deer reacts faster when alert. The best time to shoot at a deer is when it’s relaxed or distracted. If a deer has its head up and is looking around, it’s alert. A deer feeding with its head down or calmly chewing is relaxed. Read the deer’s body language, and take your shot accordingly.
If deer could take a typical eye exam, it would likely have about 20/100 vision. In other words, at 20 feet, the average deer sees as well as what a human with typical eyesight sees at 100 feet. That sounds unimpressive, but it doesn’t tell the whole story of a deer’s vision.
Depth perception and tack-sharp vision aren’t necessary for a deer’s survival. They don’t have to read your shirt label to know you’re a danger. Their eyesight excels in low light and at detecting movement.
Eyes have photoreceptors called rods and cones. Rods are sensitive to light, shapes and movements. Cones see color. A deer’s eye has more rods than our eye, but fewer cones. They can see better in low light and detect movement more effectively than we can. But they don’t see the same color spectrum we do. They can’t distinguish between greens, oranges and reds that well, but they can see differences in blue, yellow and violet shades. That’s why camo conceals bowhunters more effectively than do blue jeans.
Further, a deer’s eyes are on the side of their head, giving them a 300-degree view of their surroundings. If you can see a deer’s eye, it can see you.
How to defeat super eyesight: Many bowhunts go awry at the last moment. The deer is in bow range, and it’s calm and unaware of danger. But as the bowhunter draws, the deer bolts while waving goodbye with its tail. What happened? The deer’s incredible peripheral vision detected the movement to thwart the threat. Before making a move, bowhunters must wait until the deer looks the other way or has its vision obstructed.
Deer are perceptive. They detect anything out of place in their surroundings. Any smells, sounds or shapes that don’t belong can alarm deer. After all, woods are their year-round home. A new smell to them is like opening your home’s entry door and smelling gas. You instantly know that smell isn’t normal. Likewise, a deer walking up on a poorly disguised ground blind is like walking into your home and seeing a new couch in your living room. You can’t miss it.
Beating a deer’s senses isn’t easy, but it can be done by paying attention. Now that you’re familiar with whitetails, let’s identify their preferred habitats and find a place to hunt them.
Two basic types of hunting properties are available: public lands and private lands. To find nearby public lands, visit your state wildlife agency’s website. This is the same site where you’ll read hunting laws and buy your license. Most agency websites have a section that shows lands open to public hunting. Staff at archery shops are also good information sources on public lands. Find your state agency website here.
To gain access to private land you must select a property and ask the landowner’s permission to hunt. Some states require “trespassers” to carry the landowner’s written permission. By networking your area, writing letters to landowners, and knocking on doors you’ll eventually obtain permission to hunt private land.
Studying your quarry is a vital part of bowhunting. The more you know about an animal’s habits and favorite foods, the better your odds of success. Read about deer biology, learn the habitats they prefer, and find the signs they leave behind. As you better understand a deer’s daily life, the more reliably you’ll choose treestand sites.
The three things animals need are food, water and shelter. Those essentials provide vital information. Bowhunters who find where deer eat, drink and rest hold the key puzzle pieces.
Food sources for deer include crop fields, fallen acorns (especially from white oaks), plant shoots, apple trees, berry bushes, and mast trees that drop pecans, chestnuts and hickory nuts. During droughts or hot weather, water sources can be deer hotspots. Ponds, streams, swamps and livestock tanks all provide drinking water. Shelter cover for deer typically helps them hide from predators; and shields them from cold, wind and precipitation. Such cover often features young forest growth, thick brush and tall weeds, and low-hanging boughs of cedars, spruce and other conifers.
Deer follow paths of least resistance when traveling to food, water and shelter. Hunters can use that trait to their advantage by finding fence openings or natural pinch points created by terrain. Check out every dip or “saddle” in a ridgeline. These low points create easier travel routes and “on ramps” to a ridge’s higher portions. These terrain features often provide ambush opportunities by forcing deer to walk through small areas within bow range of a strategically placed treestand or ground blind. Likewise, three- or four-strand barbwire fences with a missing strand or collapsed section create funnels deer can’t resist.
Deer also love “edges” where two types of habitat meet. These edges could be where woods meet a field, or where thick brush meets open hardwoods. Deer like edges because they’re typically thick with cover and edible browse of several varieties, and who doesn’t like options?
You’ve found a good spot for your treestand, but you’re still unsure about your plan. A trail-camera can help you decide if you’re hunting the right spot. These motion-activated cameras strap to trees, and snap photos when deer walk in front of them. This photographic evidence also tells you when it was taken.
If you have a great spot deer visit often, don’t ruin it by leaving lots of human scent nearby. The deer’s incredible sense of smell tells them if you’re spending too much time in their domain.
Bowhunters should not visit the same area too often, even to check trail-cameras. When scouting, hunting or checking trail-cameras, wear clothing washed with scent-free soap. Also wear rubber boots to reduce scents you leave behind.
Choosing a site for your treestand is neither simple nor foolproof, so don’t get discouraged if your plans don’t work. Move your stand and try again. Deer are far better survivors than we are hunters, but that’s what makes bowhunting a fun challenge.
Every bowhunter must know a few fundamentals, including how to use the wind, where to aim on deer, how to follow a blood trail, and how to field dress a deer.
Use the wind to your advantage by choosing stands and blinds where the wind blows your scent away from wherever you expect deer to approach. It’s ideal to set up downwind of a deer trail, but crosswind setups are also excellent.
Check the wind direction by firing up your favorite weather app before driving to the woods. Weather forecasts can change, of course, so double-check the wind with an indicator when arriving at your hunting property and again at your hunting site.
If you hunt hills or mountains, you know thermals carry airborne scents up or down the landscape. Air warms in morning sunlight and rises. As evening approaches, air cools and flows downhill. If you bowhunt near the bottom of a hill in the morning, your scent flows downhill initially, but then flows uphill on rising thermals as daytime air temperatures rise.
Pay constant attention to thermals on days with little or no wind, because thermals are the only vehicle carrying your scent around. Thermals can frustrate careless hunters, but seasoned hunters use them to hunt areas they typically won’t enter because of swirling, constantly changing winds.
The most important factor in achieving quick-killing shots is placing your arrow in the vitals. Shot placement combines angles and anatomy to determine where to aim at a deer.
Correctly placed arrows pierce the lungs and/or the heart, delivering a humane kill in seconds.
The vitals are located in the chest cavity, which provides a large target. Depending on how the deer “presents” itself, you can adjust your shot for a kill. A few principles and some knowledge of deer anatomy help bowhunters expertly place their shots.
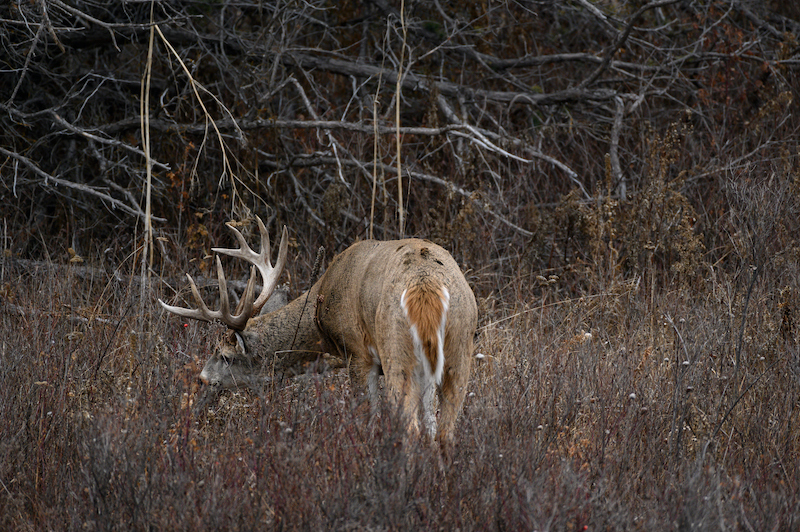
In a perfect world, deer would always stand broadside at short range, presenting a large target that exposes the vitals. An arrow striking inches behind the shoulder pierces both lungs.
Another great shot option is a deer quartering away, which also exposes the vitals. In addition, with the deer facing away, it likely won’t notice you draw your bow. While aiming, visualize the arrow’s path through the deer, and picture where the arrow will exit just behind the far shoulder. That places your aiming point farther back in the ribs on the side you can see.
Before drawing and releasing, make sure the deer’s nearest shoulder is in its forward position. If that leg is back, the shoulder will partially block the vitals. Wait for the leg to move forward, and release your arrow.
A final note: An arrow’s broadhead kills by causing massive blood loss, and an arrow passing through allows more blood to escape the chest cavity. This scenario contributes to better blood trails and more humane harvests.
As the arrow flies from the bow, bowhunters must shift gears to gather information. Note exactly where your arrow hits. If the deer kicks its rear legs high, it’s likely heart-shot. If it hunches up its back, it’s likely hit in the liver or abdomen. Watch where it runs, study its body language, and listen for it to fall.
Wait at least 30 minutes after shooting before leaving your blind or descending from your treestand. That wait will test your patience much more than waiting for a good shot opportunity. Minutes can feel like hours, but waiting can calm your nerves and help you reflect on what just happened, which helps ensure short blood trails.
If the wound didn’t cause quick death, waiting prevents you from pushing a deer farther. If you begin blood-trailing too soon the deer might resume running, which means a longer and more difficult tracking job. If your shot was less-than-ideal and you wait, the deer will likely bed after a short run and die.
After 30 minutes, quietly walk to where the deer stood when you shot. Look for blood and your arrow. Trailing scenarios vary, but hard-hit deer rarely run uphill, and they often head toward water if the wound wasn’t quickly fatal. An arrow passing through the deer usually provides excellent clues.
If you find your arrow, give it the sniff test. You might not have a bloodhound’s nose, but quick sniffs can provide insights about your hit. Bile smells like manure, and indicates an abdominal hit. Blood has a more neutral or slightly metallic odor.
Reading blood is much like reading other sign. Different colors and consistencies tell you lots about the hit. Bright red blood with small bubbles indicates a lung hit. A hit through both lungs delivers quick kills. Dark red blood signals an arterial hit, especially if it looks like it’s spraying on both sides of the deer’s flight path. That’s a good sign. Your deer is likely near.
Green bile or yellow-brown partially digested plant matter signals stomach or intestinal hits. Don’t despair, especially if you also find significant blood. You have a good chance of recovering your deer, but back off for now.
If you find signs of a bad hit, wait six to eight hours before pressing on. Tracking a poorly hit deer too soon makes it run farther. Let it bed and die. If daylight is ending and temperatures are below 40 degrees, leave the woods and return in the morning.
After assessing the situation, slowly follow the blood trail while evaluating information already collected. Look for blood drops, splatters and smears on the ground, trees and brush.
Blood quantities vary by the wound. Low exit holes typically produce great blood trails. Whether you see lots of blood or occasional splatters, work slowly while inspecting the area. Blood looks wet and shiny. It won’t look like dull red leaves unless hours have passed.
As you unravel the blood trail, stay to the side and mark each spot with orange flagging tape. If you lose the trail, return to the last spot and start making concentric circles. Go slowly and look for blood, fresh tracks, broken branches, disturbed leaves, overturned rocks, and the deer itself. Deer blend into the surroundings, and it’s easy to walk past a motionless body.
Field dressing is the process of removing an animal’s organs to cool the carcass and prevent spoiling. It also lightens the load for dragging your quarry from the woods. Although it might seem like an undesirable chore, field dressing is simple and provides interesting anatomy lessons.
The most important tool for field dressing is a sharp knife. Work with a short blade for best control over the cuts. Wear latex gloves to keep your hands clean while working. With these simple tools, you can field dress everything from turkeys to moose.
While field dressing a deer, strive to remove all the entrails without puncturing them, especially the stomach and bladder. Use your blade deliberately and take your time. It only takes a few precise cuts to remove the innards.
The guts connect to the body in three areas: the windpipe, diaphragm and anus. By severing those connections, you can pull everything out easily.
Always cut the deer’s hide from inside-out. This keeps loose hair from sticking to the meat and protects the organs from punctures. If you plan to cook the heart and liver, cut them out immediately after pulling out all the entrails. That keeps them clean and fresh for the table.
If you’ve never field dressed an animal before, don’t be intimidated. The excitement and adrenaline of a successful hunt can cause newcomers to forget their lessons. If you’re feeling uncertain, print out directions and pack them with your latex gloves, or watch a how-to video while in the field.
You can take your field-dressed deer to a processor or butcher to have it turned into cuts, sausage products, and ground venison. Deer-processing services are typically small businesses, and some only operate during hunting season. Some might not even have a website or Google listing. The staff at archery shops and fellow bowhunters at an archery club can help you find a reliable processor. Contact them before the season to learn their hours, prices and drop-off procedures.
One great thing about bowhunting is that you can take your meat from the field to your plate yourself. To process your own meat, follow these tips for great tasting venison.
Make sure you keep your venison chilled in a cooler or freezer immediately after field dressing. Photo Credit: QDMA
Treat deer like all perishable foods. That is, keep it cool and clean. Would you buy a box of steaks and leave them inside an enclosed vehicle or in the back end of a pickup truck on a hot day? No. They would quickly go from delectable to inedible. Deer cannot be left in warm places for long, and warm doesn’t just mean 90 degrees. It’s anything above a refrigerator’s temperature: about 40 degrees. Warm air spurs bacteria growth, which spoils meat.
Well-placed arrows mean short blood trails, quick deaths, and prompt field dressing and cooling. A hit to the paunch or intestines can release stomach fluids and other bad stuff, but it doesn’t necessarily taint the meat. Clean it immediately, and then cool and package it for freezing. It should be fine.
If it’s warmer than 40 degrees and you’ll be driving awhile before butchering your deer, place bags of ice in the body cavity to help cool it.
Two other important factors ensure tasty venison: butchering and meat packing. If you use the same knife for butchering that you used for field dressing, wash it in between jobs to prevent contamination. You’re processing food, so your tools and work area must be kept clean.
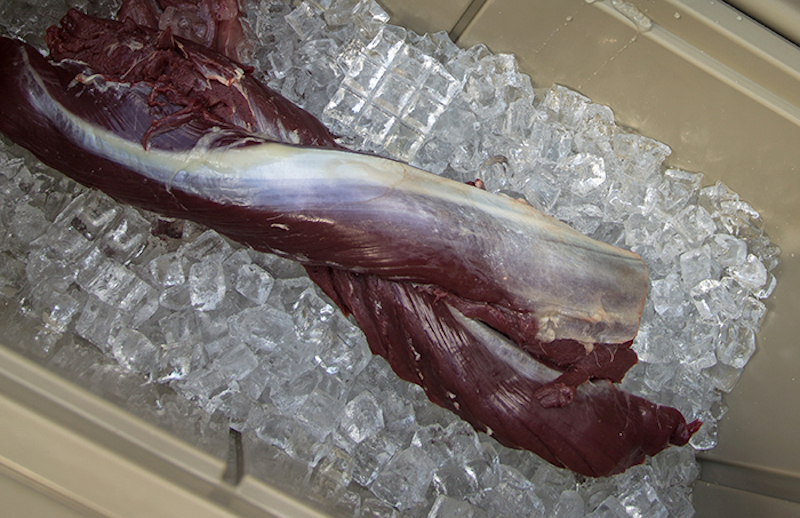
After skinning the animal, wash your blade or use a different knife for meat cutting. Hair holds dirt and bacteria, which should never touch your venison. As you separate meat from bone with your knife, also trim away all fat and sinew. Deer fat isn’t like beef fat. It’s waxy and tastes unpleasant. Remove all fat before packaging and storing the meat, because freezing can intensify fat’s strong flavor. Sinew, meanwhile, makes for tough chewing, and so slice it off while processing the meat.
Although fresh venison is delicious – especially over an open flame in camp – most of it gets stored in the freezer. If you improperly package your venison it can all go to waste – along with all your hard work – if it gets freezer-burned. That occurs when oxygen gets between the meat and the packaging material. If the burn isn’t severe, cut it off and eat the unaffected sections.
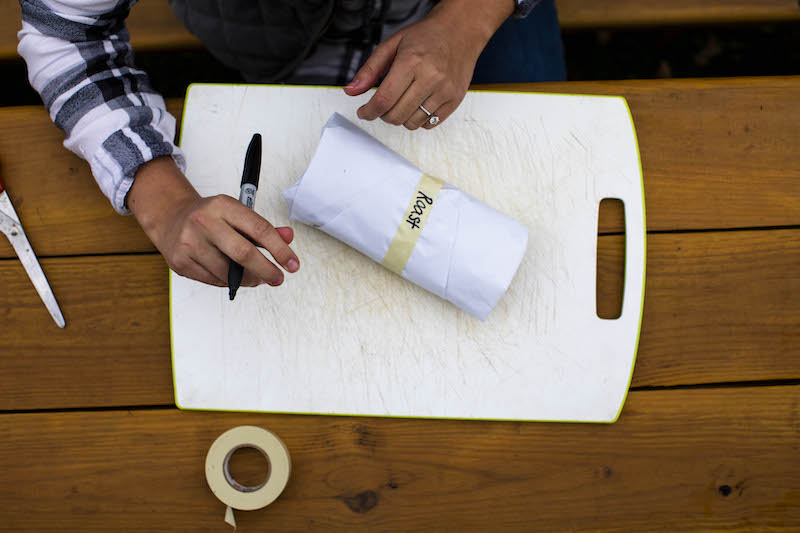
Wrap your cuts in butcher paper or seal them with a vacuum-sealer. Photo Credit: ATA
Venison must be packed airtight. Tightly wrap it in butcher paper or vacuum-seal it. Both methods are effective if done properly, allowing you to store venison a year or more in the freezer. Even so, never forget that venison isn’t beef. It’s much more lean and it easily dries out. Make sure you use recipes and cooking techniques that do it justice.
Taking wild game from the field to your plate requires planning, preparation and good tools. Head to an archery shop to get the knives, vacuum sealers, and processing supplies you need, along with expert advice.
Bowhunting is a learning process. You’ll have more failures than successes your first year. Don’t give up. Keep learning and applying each lesson to your next hunt. To ease this learning process, follow Bowhunting 360’s hunting tips and articles on social media all year.