Your arrows went through the gauntlet of bow season, so after being pulled up and lowered from trees, carried through brush and shot through animals, they could use some attention. Here are four things you can do to restore your arrows from tattered and battered to like-new condition.

Check your arrows for cracks and damage. Photo Credit: ATA
Carbon arrows can develop cracks from hard impacts, and if a compromised arrow is shot, it can splinter and break upon firing, potentially damaging your bow or causing injury. Always discard damaged arrow shafts. Use these three steps to inspect for cracks:
– Listen for crackling as you flex each arrow.
– Look at each shaft closely for hairlines.
– Wipe each arrow with a cotton ball. The tiny threads will catch on cracks and splinters.
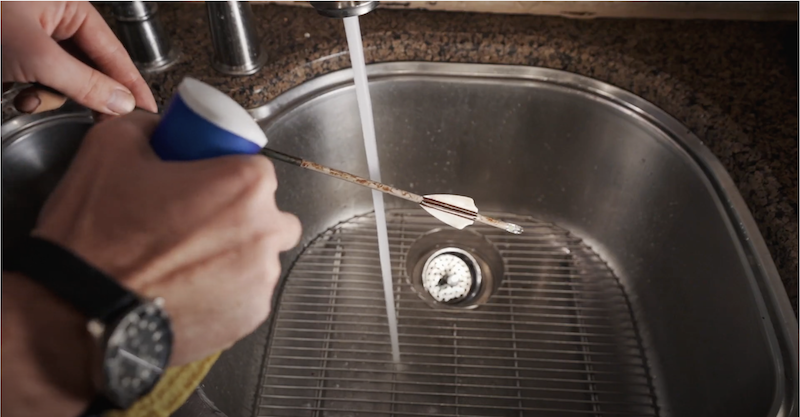
Clean up your arrows. Photo Credit: ATA
Hopefully, you have at least one arrow covered in blood from this season. Hot water and dish soap will clean blood and dirt off your arrow and fletching.
If your fletching feathers are looking flat, they just need a little time in a steam bath to make them bounce back into shape. A teakettle or a pot with an aluminum foil tent will create the necessary steam. Stick your arrow into the misty environment for a few seconds, and then massage the feathers back into shape.
Try a new fletching style this year. Photo Credit: ATA
Fletching that is torn or missing chunks will cause arrow flight and accuracy issues and should be replaced. The good news is that this is an opportunity to try out a new fletching style, color or brand.
What you’ll need:
– a sharp knife or a vane-stripping tool
– rubbing alcohol or shaft prep chemicals (sold at archery shops)
– fletching
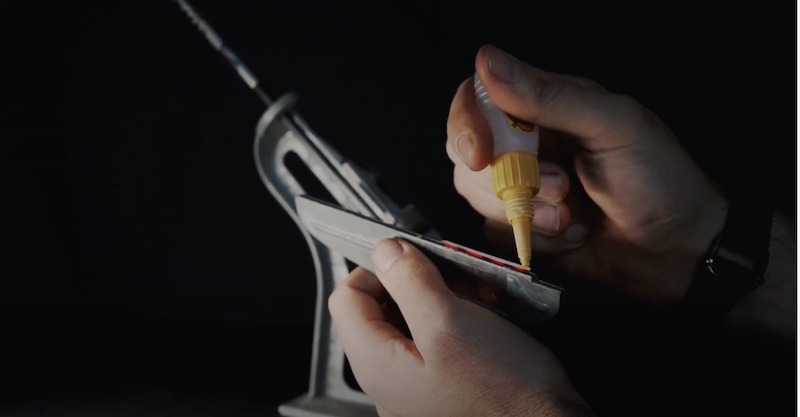
– a fletching jig
– fletching glue
The first step in the process is to remove the old fletching. This can be done with a sharp knife held parallel to the arrow shaft to cut off the fletching without gouging the shaft. But a vane-stripping tool is easier and safer to use. Purchase one, along with the other necessary supplies, from an archery shop.
If your arrows have wraps, scrape and peel them off with a vane-stripping tool or with the aid of heat from a hair dryer or heat gun.
Once your arrows are restored back into bare shafts, clean them with rubbing alcohol or special shaft-prep products sold by archery shops. These cleaners remove dirt, oils and films that hinder bonding or prevent glue from setting.
To attach new fletching to the arrow shaft, you’ll need a jig that aligns and positions each feather precisely and consistently. Jigs have a base that holds the arrow shaft and a clamp that holds the fletching against the shaft.
Read the jig’s instructions to learn how to set it up for your arrows. If you have questions, ask the pros at your archery shop to teach you the process. They’ll even help you set up the jig.
You’re now ready to fletch your arrows. Place a shaft in the jig and a fletching in the clamp. Then run a thin bead of glue down the length of the feather or vane. Place the clamp on the jig while applying a light pressure to seat the fletching against the shaft. Let the glue dry, and repeat the process with your next fletching.
Your arrows are now ready for your next hunt, 3D archery shoot or backyard practice session. If you need assistance repairing your arrows, the experts at a local archery shop are an excellent resource. Find one near you by clicking here.