You have a big smile on your face and a tagged bow-kill at your feet. You did it!
If it’s an adult white-tailed deer, you’ve harvested 30- to 50-plus pounds of lean meat, depending on its age and your geographic location. There’s only one problem: Your meat isn’t packaged in cellophane and Styrofoam like meat at grocery stores. It’s inside a hide, fully intact and attached to bone.
OK, No problem. First, you must field dress your deer.
Field dressing means removing the animal’s internal organs, also known as the entrails, which is necessary to preserve its meat. This process also helps cool the carcass, slow bacterial growth, and remove blood and paunch (stomach) materials.
Here’s a step-by-step guide to field dressing deer:
Use a sharp knife to cut through the meat smoothly. Photo Credit: ATA
The only tool you need is a sharp knife, but we also recommend latex gloves and a small bone saw. Don’t forget to remove your watch and jewelry. Visit an archery shop for help finding field-dressing gear.

Find your broadhead. If it is not in the woods, it may be inside the deer. Photo credit: ATA
If you haven’t recovered your arrow and broadhead, the broadhead might still be inside the deer. If you can’t locate it, carefully watch for it as you field dress the deer.
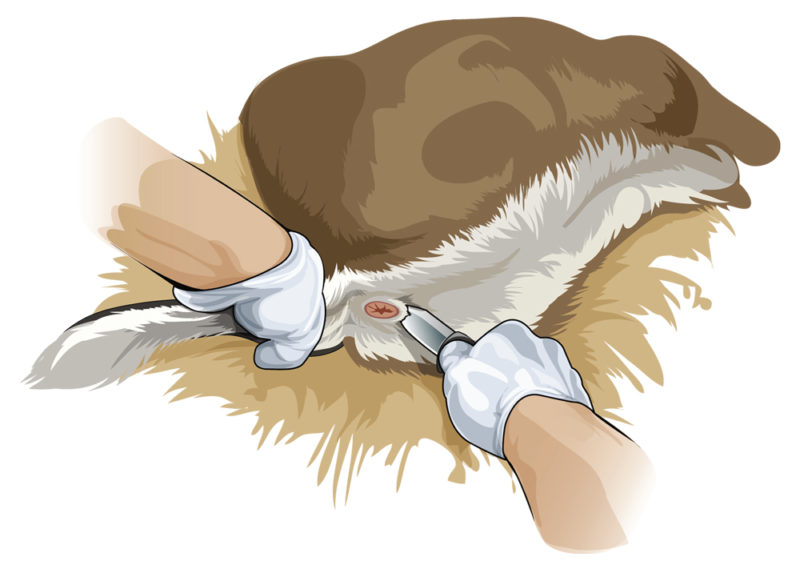
The first step in field dressing a deer is cutting a coring ring a couple of inches deep through the skin/hide around the anus. Photo Credit: Ryan Kirby
With the deer on its side or back, kneel behind it and cut a coring ring a couple of inches deep through the skin/hide around the anus. Slide your knife deeper into the pelvic canal and retrace the coring cuts to slice attached membranes and free those last few inches of colon. Be careful not to puncture the colon. Its contents can taint meat.
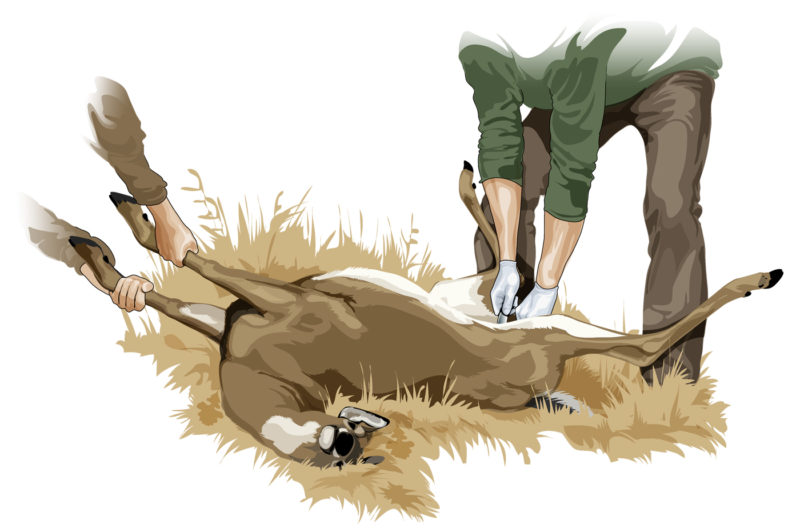
Before making your first incision, position the deer belly up with its head elevated Photo Credit: Ryan Kirby
Locate a slope and position the deer belly up with its head elevated. Spread the hind legs and have a buddy keep them apart to hold the body in place. If you’re alone, secure the carcass by wedging rocks or wood under its ribcage. To make things easier yet, tie each leg to a tree.
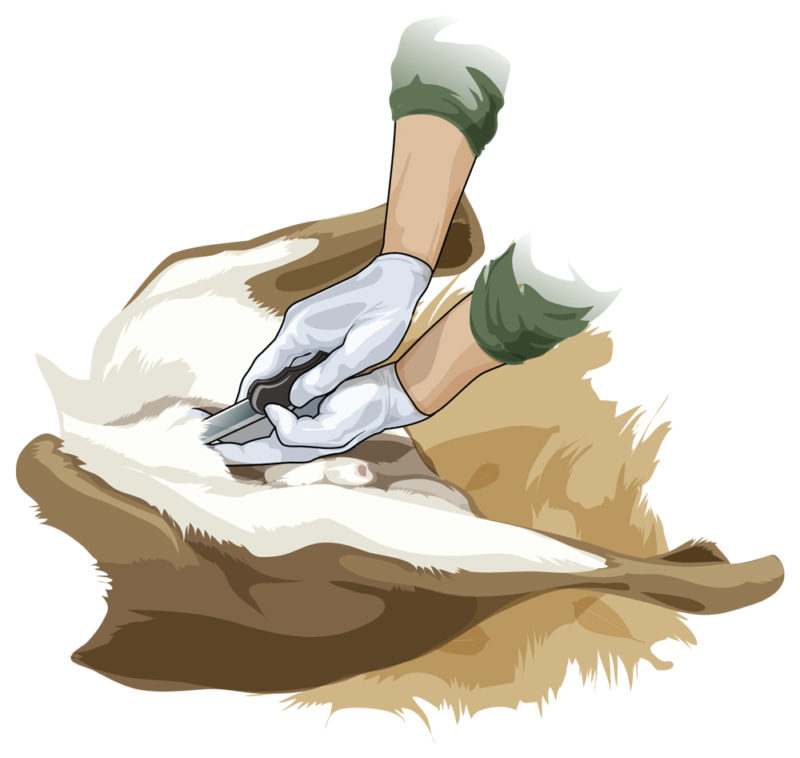
To make your first cut, grab the skin where it forms a “V” between the rear legs and cut a shallow 1-inch slit through the skin. Photo Credit: Ryan Kirby
Grab the skin where it forms a “V” between the rear legs. This is just below the doe’s milk sac or just above the buck’s testicle. Cut a shallow 1-inch slit through the skin. If it’s a male, cut and remove the genitalia.

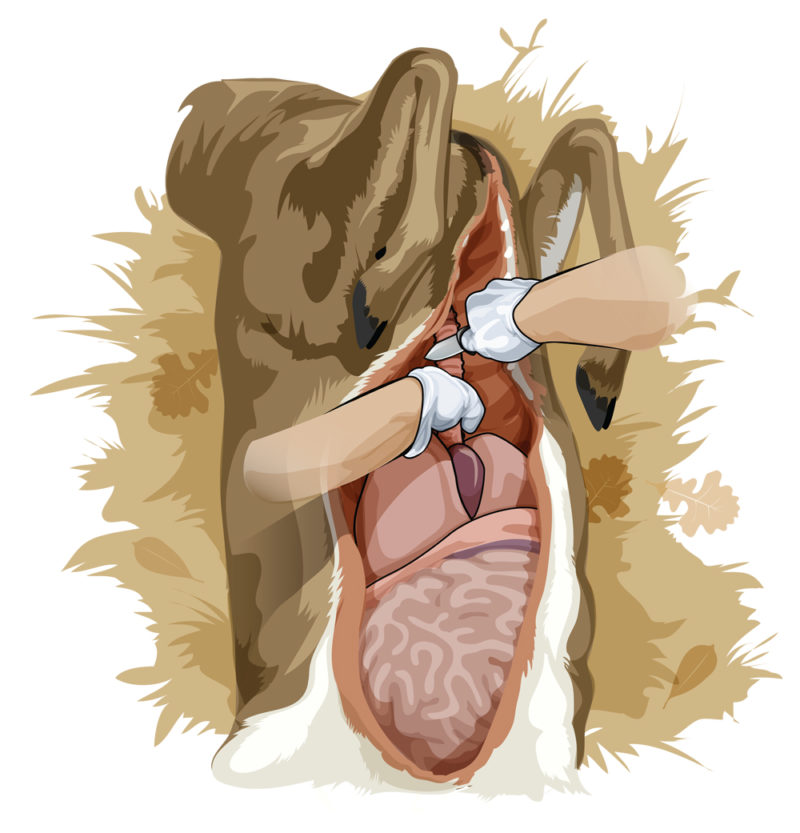
Using your first incision as a starting point, use a gut hook to cut open the belly from the pelvic bone to the breastbone. Photo Credit: Ryan Kirby
Using your first incision as a starting point, use a gut hook to cut open the belly from the pelvic bone to the breastbone. If you don’t have a gut hook, hold your index and middle fingers inside the hole to separate the hide from the organs and guide your knife. Hold your knife so its blade faces up to avoid puncturing organs, and cut all the way to the sternum/ribcage.
If you’re getting the deer mounted by a taxidermist, do not cut farther.
If you’re not taking it to a taxidermist, straddle the deer so you’re over the chest cavity, with the blade facing away toward its head. Cut through the sternum/ribcage until reaching the neck. This requires strong, steady leverage, but isn’t too difficult. Do not cut into the neck.
Cut the diaphragm from the chest cavity’s walls and work all the way to the spine to separate it. Photo Credit: Ryan Kirby
The diaphragm is the thin membrane separating the chest from the abdomen. It must be cut away to reach the chest cavity’s organs. Cut the diaphragm from the cavity’s walls and work all the way to the spine to separate it.
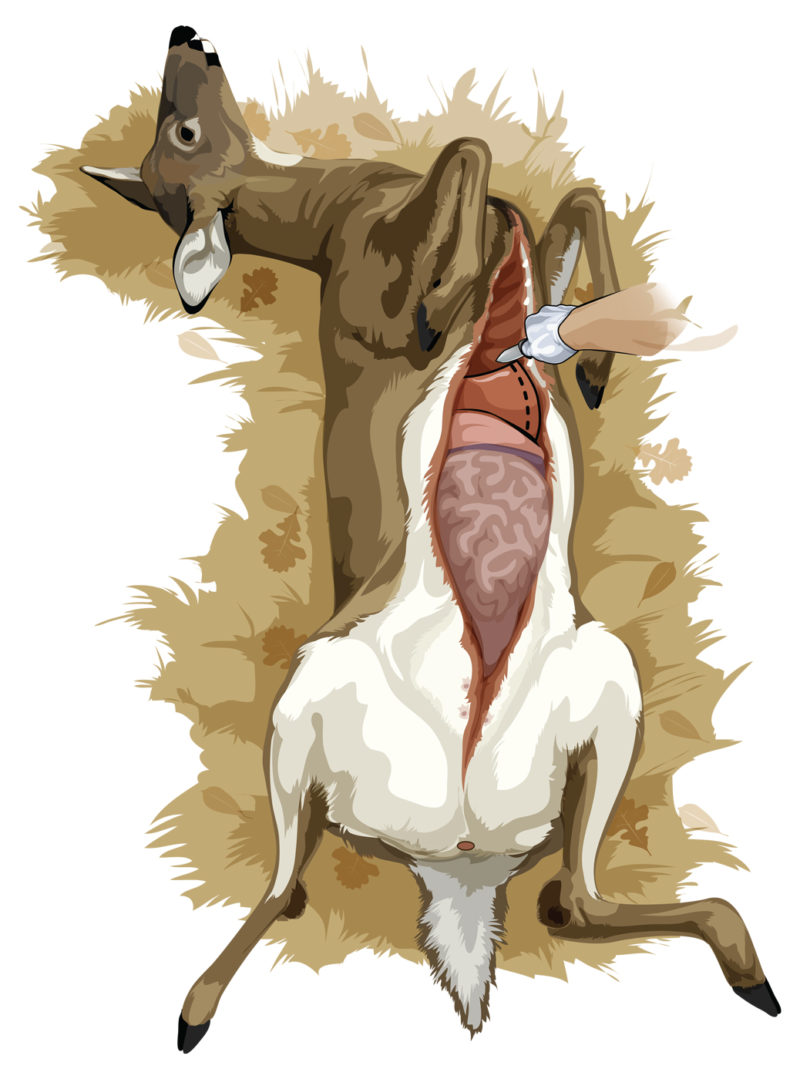
After locating the windpipe, sever it to free the entrails. Photo Credit: Ryan Kirby
With your free hand, reach up and grab the windpipe above the lungs and heart. Hold tight and pull it toward you so it’s taut. With your other hand, take your knife and carefully reach up, locate the windpipe, and sever it to free the entrails.
If you want to keep the heart and liver, cut them free and place them in a plastic bag.
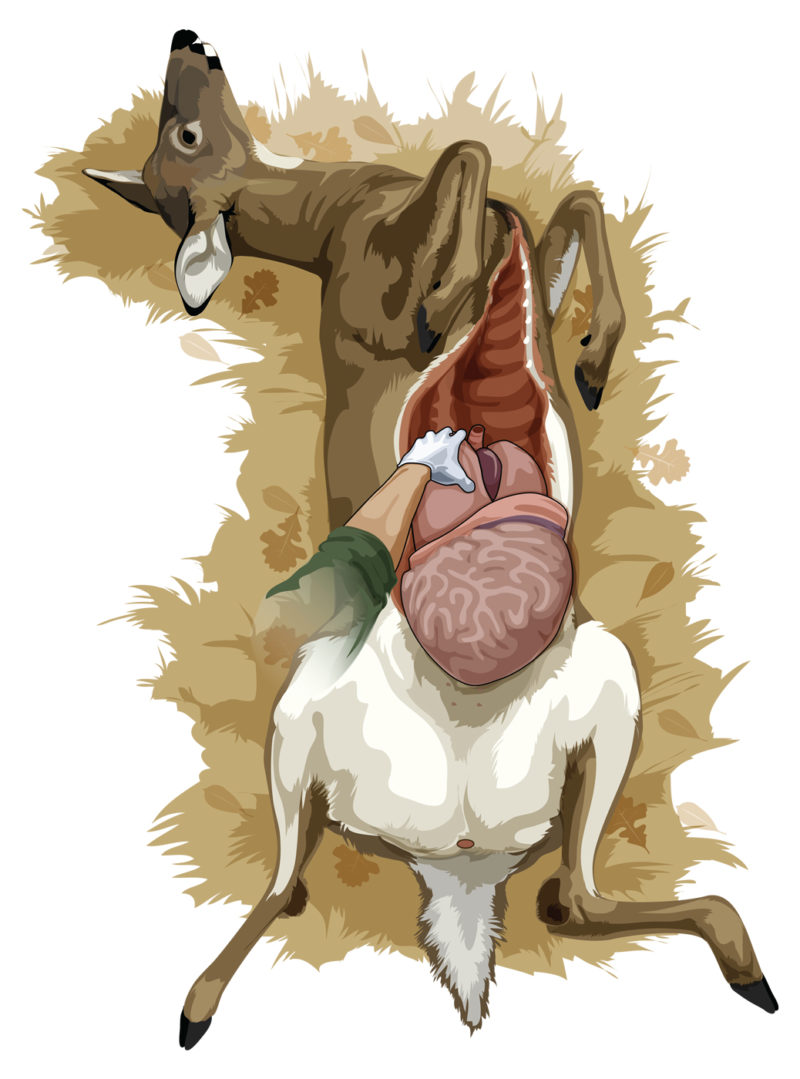
The heart, liver, lungs, intestines, stomachs and bladder can be removed with one long, strong pull on the windpipe. Photo Credit: Ryan Kirby
With the anus free, diaphragm cut and windpipe severed, the heart, liver, lungs, intestines, stomachs and bladder can be removed with one long, strong pull on the windpipe. If the entrails don’t come out easily, cut any tissues connecting them to the carcass. The colon, which you cut free inside the pelvic canal in Step 3, should slide through and pull out with the rest of the innards. In most cases, it’s OK to leave the gut pile where you field dress the deer, but be mindful of your state regulations and public lands etiquette.
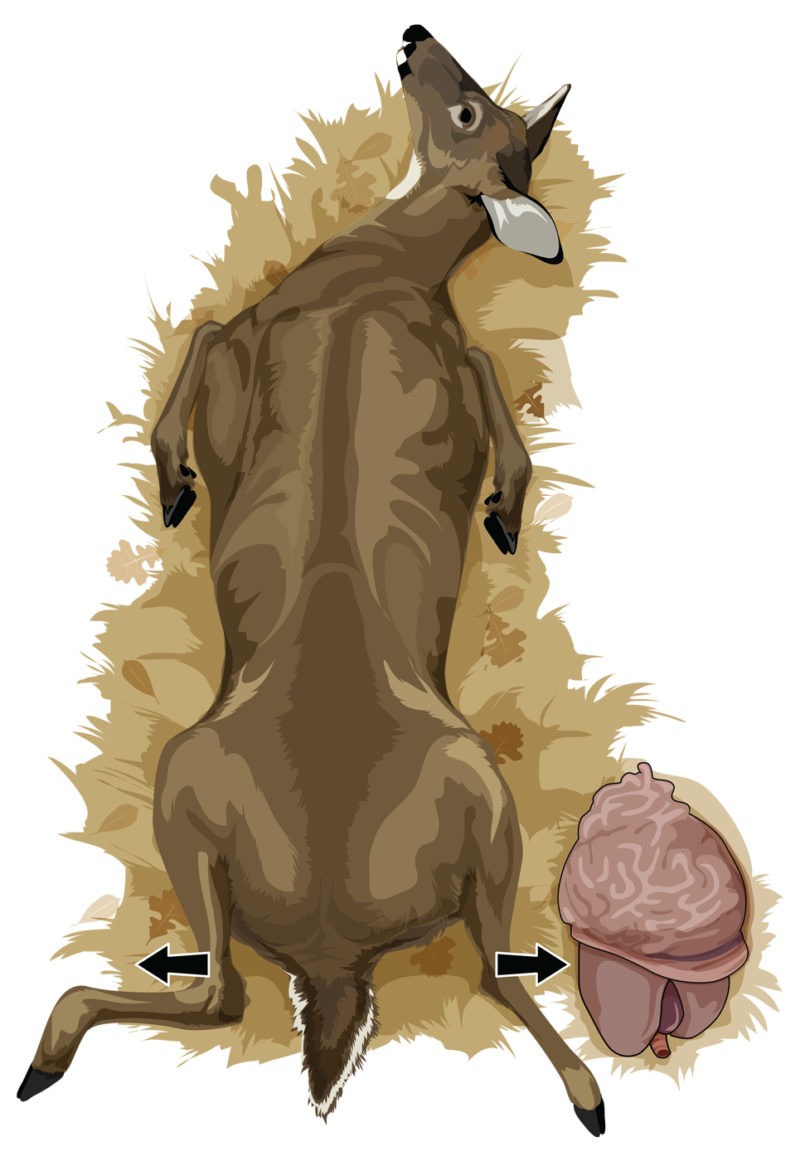
After removing the entrails, turn the deer over and spread its legs so the cavity is open against the ground. This helps pooled blood drain. Photo Credit: Ryan Kirby
Turn the body over and spread its legs so the cavity is open against the ground. This helps pooled blood drain. Avoid letting dirt, sticks, leaves and other debris contact the meat.
Once home or back in camp, hang the deer from its antlers or neck to further drain the blood. Consider the air temperature to avoid meat spoilage. Sources say meat should be chilled or stored below 40 degrees to stop bacterial growth. If necessary, use ice to cool the carcass until you’re ready to process its meat.
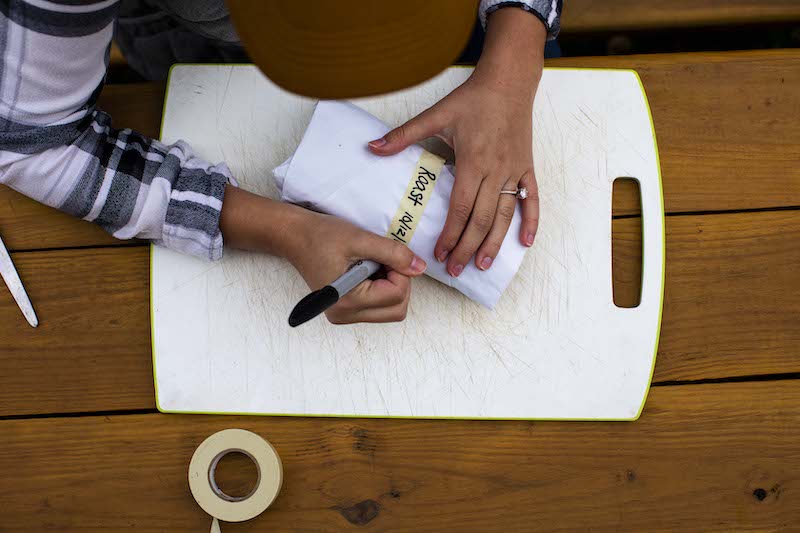
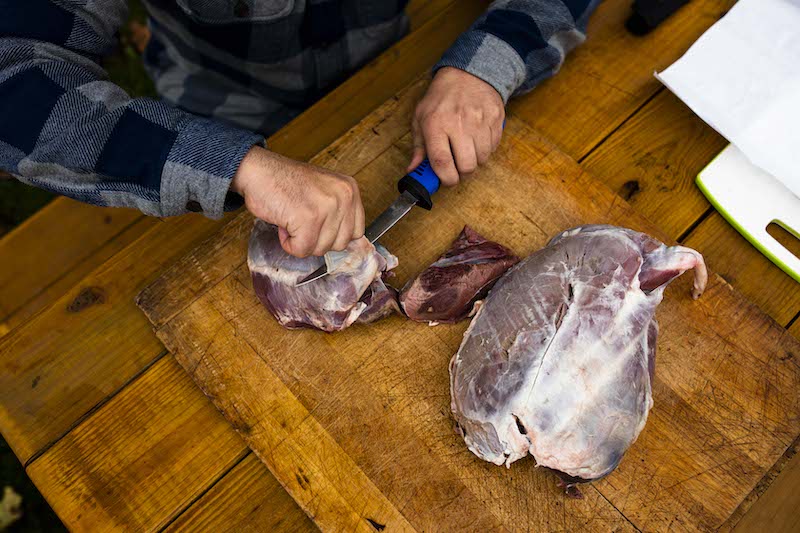
After you’ve field dressed the deer, label the meat with the cut and date and store it in the freezer. Photo Credit: ATA
Some hunters rinse the body cavity, but it’s seldom necessary unless it’s contaminated with hair, dirt, feces or paunch (stomach) materials. Use clean water and do not rinse it in a pond or stream. Also, prop open the body cavity with a stick to help air circulate and cool the carcass.
Your next step, if you’re processing the meat yourself, is to fillet out the backstraps, tenderloins and neck meat, and remove the quarters. If not, bring the carcass to a professional deer processor.
As with every job, practice makes perfect. The more deer you arrow, the more you’ll fine-tune your field-dressing skills.
What are you waiting for? The deer woods beckon! Get back out there. Fill your tags and fill your freezer!